News
Layer Cage Installation Guide: From Delivery to Full Operation
Source: TBBView: 92Layer Cage Installation Guide: From Delivery to Full Operation

You just received a truckload of layer cage components. Steel beams, cage mesh, feeding troughs, nipple drinkers, manure belts, and enough bolts to make your head spin. Now what? Installing a commercial layer cage system is not rocket science, but it does demand methodical planning. Skip a step here, cut a corner there, and you are looking at wobbly cages, uneven feed distribution, or worse — structural failures six months down the line. This guide walks you through every phase of installation, from the moment the first crate hits the ground to the day you switch on automated systems and welcome your first flock.
Pre-Installation Preparation

Before any steel touches concrete, spend time on site preparation. The foundation determines everything. Uneven flooring causes misaligned cage rows, which cascades into feeding line gaps, egg belt jams, and manure belt tracking problems. Use a laser level to verify the floor flatness within plus or minus five millimeters across the entire house. If your floor slopes more than that, self-leveling screed is cheaper than fixing alignment issues later.
Check your house dimensions against the layout drawings. Measure twice. Confirm that column spacing matches the cage module width. A common mistake involves assuming all 4-tier H-type layer cages use identical bay widths — they do not. Different manufacturers specify different support intervals, and guessing here means custom-cutting parts on-site or living with misaligned rows.
Organize your components before assembly begins. Sort cage panels by tier level. Group all front and rear frames together. Keep hardware sorted in labeled containers — M8 bolts for frame connections, M6 for wire mesh clips, specialized nuts for adjustable feet. Nothing kills installation speed like hunting for the right bolt while your team stands around waiting.
Frame Assembly and Positioning

Start with the upright columns. These vertical supports carry the full weight of multi-tier cages plus the birds, so their placement matters enormously. Anchor each column to the floor using expansion bolts or chemical anchors, depending on your substrate. Concrete floors handle standard wedge anchors well. Wooden platforms or raised foundations require different fastening methods entirely.
Plumb each column with a spirit level both vertically and along the row axis. Even a two-degree tilt over three meters creates visible misalignment by the fourth tier. Lock the base plates once confirmed straight, then move to horizontal beam installation. Connect adjacent columns using the main crossbeams, tightening bolts in a star pattern to avoid pulling the frame out of plumb.
For A-type layer cage configurations, the triangular truss structure requires diagonal bracing during assembly. Do not skip this step even if the frame feels rigid without it. Birds moving on upper tiers generate dynamic loads that loosen unbraced joints over time.
Cage Mesh and Panel Installation

With the skeleton in place, start installing cage wire mesh from the bottom tier upward. Bottom-tier cages sit closest to the manure pit or belt, so their positioning affects clearance for cleaning equipment. Maintain consistent gaps between cage bottoms and the manure system surface — typically thirty to forty millimeters depending on your belt type.
Attach front and rear mesh panels using the specified clips or fasteners. Hot-dip galvanized wire mesh resists corrosion, but only if you avoid damaging the zinc coating during installation. Use proper tools rather than hammering clips into place, which cracks the galvanization and creates rust starting points.
Install partition meshes between cage compartments last. These dividers determine bird density per cell, so measure carefully. A ten-millimeter error here changes your stocking density by half a bird per compartment, which compounds across thousands of cages.
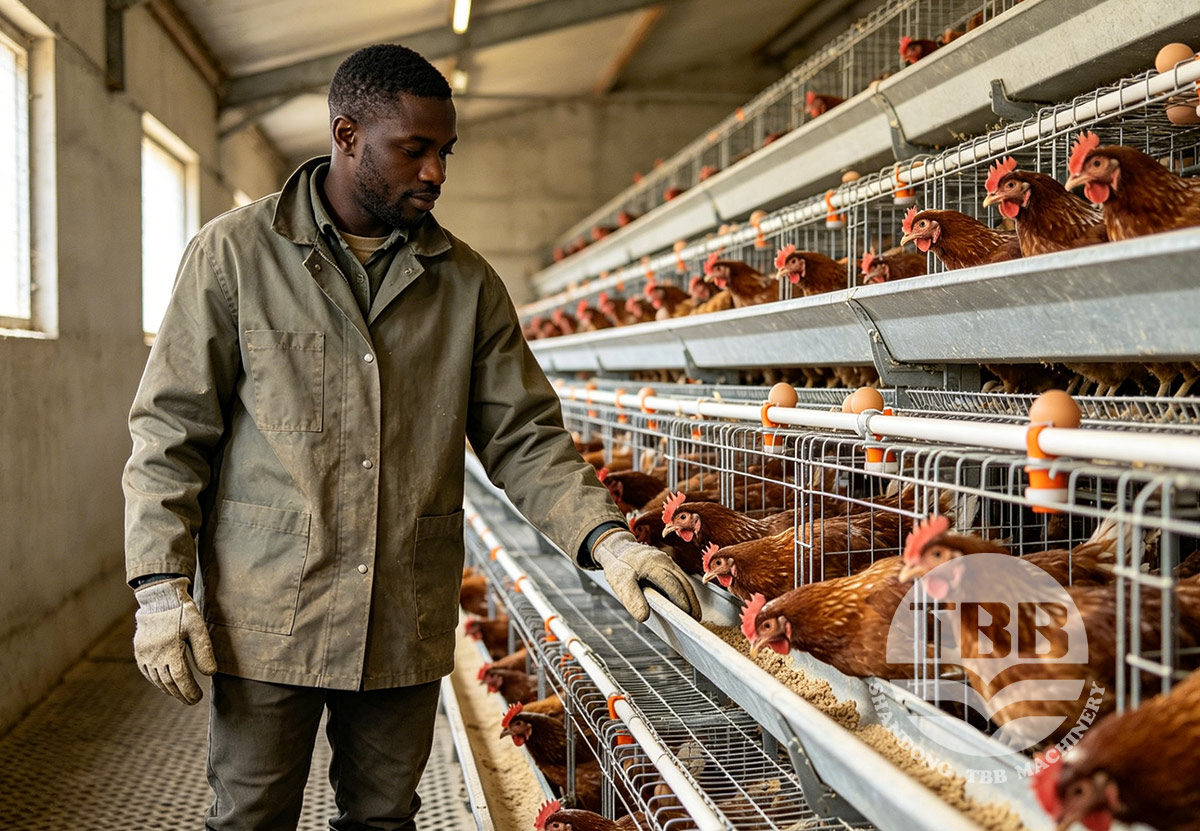
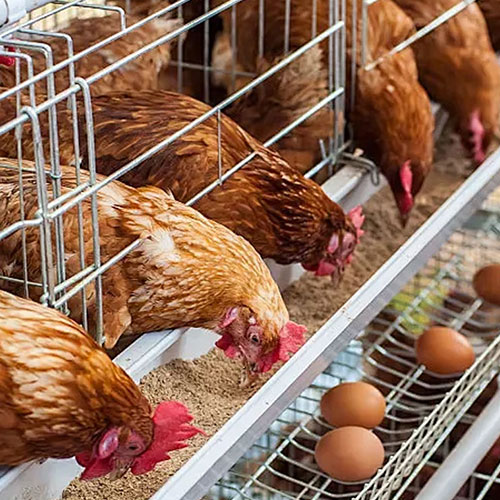
Feeding System Installation

Automated feeding lines run along the front of each cage tier, and their installation precision directly impacts feed distribution uniformity. Begin by mounting the drive motor and corner pulleys according to the system diagram. The drive unit position determines chain or auger tension, so anchor it securely before running any feed line components.
Hang feed troughs or pans at the manufacturer-specified height relative to the cage floor. Too high, and smaller birds cannot reach comfortably. Too low, and birds scratch feed onto the manure belt below, wasting product and creating sanitation issues. Most layer breeds perform best when the trough lip sits approximately twenty-five millimeters above bird back height at maturity.
Connect hopper units or silo discharge points to the main feed line. Ensure all joints are sealed properly — loose connections spill feed into the house structure, attracting rodents and creating spoilage hotspots. Test-run the empty system for at least fifteen minutes before introducing any feed, listening for unusual noises that indicate misalignment or obstruction.
Drinking System Setup
Nipple drinker lines install parallel to feeding systems but require their own leveling protocol. Water pressure regulators mount at the line inlet, and their calibration determines whether birds receive adequate flow without dripping onto the manure surface below. Set pressure between twenty and forty centimeters of water column for most adult layer applications, adjusting slightly lower for younger stock.
Support drinking lines with hangers spaced no more than sixty centimeters apart. Sagging lines create pressure variations along the row, meaning birds at one end drink freely while others struggle. Install drip cups beneath each nipple to catch occasional leakage, directing water away from the manure belt.
Connect the main water supply through a filtration system. Even clean municipal water carries sediment that clogs nipple mechanisms over time. A simple screen filter before the pressure regulator extends drinker lifespan significantly and reduces maintenance frequency.
Manure Belt Installation

If your system includes automatic manure removal, belt installation demands patience. Unroll belts along the cage row length, ensuring they lie flat without twists or folds. Twisted belts track off rollers during operation, causing edge wear and eventual failure.
Tension belts according to specifications — tight enough to prevent sagging under load but not so tight that motor strain increases. Most belt systems include a tension adjustment mechanism at the drive end. Set initial tension, then fine-tune after the first week of operation once the belt material settles.
Install scraper bars or paddles at regular intervals along the belt surface. These devices push manure toward the discharge end during each cycle. Space them consistently — irregular spacing creates uneven load distribution and tracking problems.
Egg Collection System Integration
For cages equipped with automatic egg collection, the egg belt installs after all cage components are in place. Roll the collection belt along the gentle slope of the cage floor, where laid eggs roll naturally onto the conveyor surface. Verify the angle — too steep and eggs crack from impact; too shallow and eggs accumulate rather than rolling.
Connect the collection belt to the central elevator or cross conveyor that moves eggs toward the packing area. Test the system with plastic dummy eggs before introducing real ones. Watch for pinch points where eggs might jam or fall off the belt.
Calibrate the belt speed to match your expected production rate. Overly fast belts increase egg breakage through collision. Overly slow belts cause backup and crowding at the collection point.
Electrical Wiring and Control Systems
Run power cables along designated cable trays or conduits, keeping them separate from water lines. Moisture and electricity do not mix well in poultry houses. Use waterproof junction boxes for all connections and seal conduit entries with appropriate gaskets.
Mount control panels in accessible locations away from direct bird contact and wash-down spray. Label each circuit clearly — feeding motors, drinker pumps, manure belt drives, lighting zones. Future maintenance becomes infinitely easier when you do not need to trace unidentified wires.
Test each subsystem independently before attempting coordinated operation. Run the feeding system alone for a cycle. Then drinkers. Then manure belts. Then egg collection. Isolate problems at the component level rather than debugging everything simultaneously.
Final Inspection and Commissioning

Walk every row. Check every connection. Wiggle every cage panel. If anything moves or rattles, tighten it now. Inspect all welded joints on the frame structure for cracks or incomplete fusion. Verify that hot-dip galvanized surfaces show no bare metal spots where coating damage occurred during handling.
Run a complete system test with all automation active simultaneously. Observe for at least thirty minutes. Listen for abnormal sounds. Watch for vibration in rotating components. Note any belt tracking drift or chain slack issues.
Document everything. Photograph completed installations. Record serial numbers on major components. File warranty cards before forgetting. This paperwork seems tedious until you need spare parts or service support years later.
Bringing In Your First Flock
Once the system passes commissioning, prepare for birds. Sanitize all surfaces with approved disinfectants. Run feeding and drinking systems with clean water and feed to flush manufacturing residues. Set environmental controls to target temperature and humidity levels before arrival.
Introduce birds gradually if possible. Allow them to acclimate to nipple drinkers and automated feeders over the first few days. Monitor behavior closely — birds refusing to drink or eat often indicate equipment adjustment needs rather than health issues.
Your installation work directly impacts farm performance for the next decade or longer. A well-installed cage system operates quietly, efficiently, and with minimal intervention. A rushed installation generates constant headaches, higher mortality, and reduced profitability. Take the time now, save money later.
Need help planning your installation? Our team has supervised layer cage projects across Southeast Asia, Africa, and Central America. We provide detailed installation manuals, video guides, and on-site technician support for every order. Contact us today and mention this article to lock in the best pricing of the year on your complete cage system package. This offer will not last long — reach out now to secure your quote.